 Loading...
Read more...
Showing posts with label Lego Mindstorms. Show all posts
Showing posts with label Lego Mindstorms. Show all posts
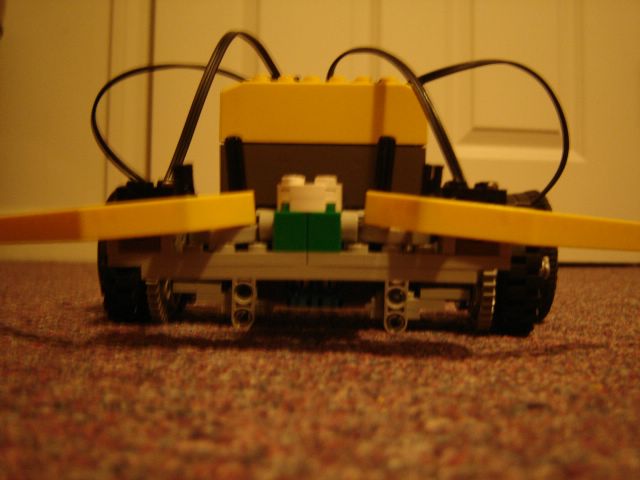
Project 2: a modified Roverbott
View CommentsMy Goal: To build a Roverbot and have it behave like a bumber car (Hit a wall, bounce back and change direction) and have the RoverBot respond to commands from the remoteControl
I used this Tutorial as reference

In the "specialized trails" section, read chapters, Overview, Behavior and Navigation.
Here are my Java files
HitWallS1.java
import josx.robotics.*;
import josx.platform.rcx.*;
public class HitWallS1 implements Behavior {
public boolean takeControl() {
return Sensor.S1.readBooleanValue();
}
public void suppress() {
// Motor.A.stop();
//Motor.C.stop();
Motor.A.forward();
Motor.C.forward();
}
public void action() {
// Back up:
Motor.A.backward();
Motor.C.backward();
try{Thread.sleep(1000);}catch(Exception e) {}
// Rotate by causing only one wheel to stop:
Motor.A.stop();
try{Thread.sleep(300);}catch(Exception e) {}
Motor.C.stop();
}
}
HitWallS2.java
import josx.robotics.*;
import josx.platform.rcx.*;
public class HitWallS2 implements Behavior {
public boolean takeControl() {
return Sensor.S2.readBooleanValue();
}
public void suppress() {
// Motor.A.stop();
//Motor.C.stop();
Motor.A.forward();
Motor.C.forward();
}
public void action() {
// Back up:
Motor.A.backward();
Motor.C.backward();
try{Thread.sleep(1000);}catch(Exception e) {}
// Rotate by causing only one wheel to stop:
Motor.A.stop();
try{Thread.sleep(300);}catch(Exception e) {}
Motor.C.stop();
}
}
DriveForward.java
import josx.robotics.*;
import josx.platform.rcx.*;
public class DriveForward implements Behavior {
public boolean takeControl() {
return true;
}
public void suppress() {
Motor.A.stop();
Motor.C.stop();
}
public void action() {
Motor.A.forward();
Motor.C.forward();
}
}
RemoteControlTest.java
/*
* $Log: RemoteControlTest.java,v $
* Revision 1.2 2002/11/01 16:01:28 mpscholz
* changed startup display
*
* Revision 1.1 2002/09/28 10:29:34 mpscholz
* initial version for the test example of the remotecontrol package
*
*/
import josx.platform.rcx.*;
import josx.platform.rcx.remotecontrol.*;
import josx.robotics.*;
/////////////////////////////////////////////////////////
/**
*
* This class is a main test program for the remote control sensor
* @author Matthias Paul Scholz (mp.scholz@t-online.de)
* @version 1.0 (24/09/2002)
*/
public class RemoteControlTest implements RemoteControlListener {
////////////////////////////////////////////
// constants
////////////////////////////////////////////
private static final char[] MESSAGE1 = {'M','S','G','1'};
private static final char[] MESSAGE2 = {'M','S','G','2'};
private static final char[] MESSAGE3 = {'M','S','G','3'};
private static final char[] MOTOR_DOWN = {'M','O','T','-'};
private static final char[] MOTOR_UP = {'M','O','T','+'};
private static final char[] PROGRAM1 = {'P','R','O','G','1'};
private static final char[] PROGRAM2 = {'P','R','O','G','2'};
private static final char[] PROGRAM3 = {'P','R','O','G','3'};
private static final char[] PROGRAM4 = {'P','R','O','G','4'};
private static final char[] PROGRAM5 = {'P','R','O','G','5'};
private static final char[] STOP = {'S','T','O','P'};
private static final char[] SOUND = {'S','O','U','N','D'};
private static final char[] READY = {'R','E','A','D','Y'};
////////////////////////////////////////////
// fields
////////////////////////////////////////////
/**
* current sensor states (activated = true)
*/
private boolean[] fSensorState = { false,false,false };
////////////////////////////////////////////
// constructors
////////////////////////////////////////////
////////////////////////////////////////////
/**
* creates a new instance of RemoteControlTest
*/
public RemoteControlTest() {
// reset to initial state
reset();
// display "ready"
TextLCD.print(READY);
} // RemoteControlTest()
////////////////////////////////////////////
// public methods
////////////////////////////////////////////
////////////////////////////////////////////
/**
* main method for test reasons
* @throws InterruptedException
*/
public static void main(String[] args)
throws InterruptedException {
Behavior b1 = new DriveForward();
Behavior b2 = new HitWallS1();
Behavior b3 = new HitWallS2();
Behavior [] bArray = {b1, b2,b3};
Arbitrator arby = new Arbitrator(bArray);
// instantiate remote control test instance
RemoteControlTest remoteControlTest = new RemoteControlTest();
// create remote control sensor
RemoteControlSensor sensor = new RemoteControlSensor();
sensor.addRemoteControlListener(remoteControlTest);
// reset engine
remoteControlTest.reset();
// just run until RUN button is pressed again
arby.start();
Button.RUN.waitForPressAndRelease();
System.exit( 0);
} // main()
////////////////////////////////////////////
// RemoteControListener interface methods
////////////////////////////////////////////
////////////////////////////////////////////
/**
* handler for the message 1 button
*/
public void message1Pressed() {
// display
TextLCD.print(MESSAGE1);
// current sensor state?
boolean sensorState = fSensorState[0];
// activate/passivate sensor
if(sensorState)
Sensor.S1.passivate();
else
Sensor.S1.activate();
// change sensor state
fSensorState[0] = !sensorState;
} // message1()
////////////////////////////////////////////
/**
* handler for the message 2 button
*/
public void message2Pressed() {
// display
TextLCD.print(MESSAGE2);
// current sensor state?
boolean sensorState = fSensorState[1];
// activate/passivate sensor
if(sensorState)
Sensor.S2.passivate();
else
Sensor.S2.activate();
// change sensor state
fSensorState[1] = !sensorState;
} // message2()
////////////////////////////////////////////
/**
* handler for the message 3 button
*/
public void message3Pressed() {
// display
TextLCD.print(MESSAGE3);
// current sensor state?
boolean sensorState = fSensorState[0];
// activate/passivate sensor
if(sensorState)
Sensor.S3.passivate();
else
Sensor.S3.activate();
// change sensor state
fSensorState[2] = !sensorState;
} // message3()
////////////////////////////////////////////
/**
* decrements motor power
* @param aMotor the motor
*/
public void motorDownPressed(Motor aMotor) {
// display
TextLCD.print(MOTOR_DOWN);
// get current power
int power = aMotor.getPower();
// get current state
if(power==0) {
// move backward
aMotor.setPower(++power);
aMotor.backward();
} else {
if(aMotor.isForward())
// decrease forward movement
aMotor.setPower(--power);
else {
// move backward
aMotor.setPower(Math.min(7,++power));
aMotor.backward();
} // else
} // else
// display power of motors
displayMotorsPower();
} // motorDownPressed()
////////////////////////////////////////////
/**
* increments motor power
* @param aMotor the motor
*/
public void motorUpPressed(Motor aMotor) {
// display
TextLCD.print(MOTOR_UP);
// get current power
int power = aMotor.getPower();
// get current state
if(power==0) {
// move forward
aMotor.setPower(++power);
aMotor.forward();
} else {
if(aMotor.isBackward())
// decrease backward movement
aMotor.setPower(--power);
else {
// move forward
aMotor.setPower(Math.min(7,++power));
aMotor.forward();
} // else
} // else
// display power of motors
displayMotorsPower();
} // motorUpPressed()
////////////////////////////////////////////
/**
* handler for the program 1 button
*/
public void program1Pressed() {
// display
TextLCD.print(PROGRAM1);
Motor.A.forward();
Motor.C.forward();
} // program1()
////////////////////////////////////////////
/**
* handler for the program 2 button
*/
public void program2Pressed() {
// display
TextLCD.print(PROGRAM2);
Motor.A.backward();
Motor.C.backward();
} // program2()
////////////////////////////////////////////
/**
* handler for the program 3 button
*/
public void program3Pressed() {
// display
TextLCD.print(PROGRAM3);
Motor.A.stop();
Motor.C.forward();
} // program3()
////////////////////////////////////////////
/**
* handler for the program 4 button
*/
public void program4Pressed() {
// display
TextLCD.print(PROGRAM4);
Motor.A.forward();
Motor.C.stop();
} // program4()
////////////////////////////////////////////
/**
* handler for the program 5 button
*/
public void program5Pressed() {
// display
TextLCD.print(PROGRAM5);
} // program5()
////////////////////////////////////////////
/**
* handler for the sound button
*/
public void soundPressed() {
// display
TextLCD.print(SOUND);
// sound
Sound.beep();
} // sound()
////////////////////////////////////////////
/**
* handler for the stop button
*/
public void stopPressed() {
// display
TextLCD.print(STOP);
// reset
reset();
} // stop()
////////////////////////////////////////////
// public methods
////////////////////////////////////////////
////////////////////////////////////////////
/**
* resets the engine to its initial state
*/
public void reset() {
// stop motors
Motor.A.stop();
Motor.A.setPower(0);
Motor.B.stop();
Motor.B.setPower(0);
Motor.C.stop();
Motor.C.setPower(0);
// passivate sensors
Sensor.S1.passivate();
Sensor.S2.passivate();
Sensor.S3.passivate();
for(int i=0;i
format: 0
*/
private void displayMotorsPower() {
int powers = Motor.A.getPower() * 100
+ Motor.B.getPower() * 10
+ Motor.C.getPower();
LCD.showNumber(powers);
} // displayMotorsPower()
} // class RemoteControlTest
Compiling, Linking and Loading the program on to the RCX
Step 1. Run setenv from C:\Lejos\Project to initialize your environment.
********************************************************
C:\Lejos\Project\RoverBot>..\setenv
C:\Lejos\Project\RoverBot>set LEJOS_HOME=C:\Lejos\lejos
C:\Lejos\Project\RoverBot>set CLASSPATH=C:\Lejos\lejos\lib\classes.jar;.;.;C:\PR
OGRA~1\JMF21~1.1E\lib\sound.jar;C:\PROGRA~1\JMF21~1.1E\lib\jmf.jar;C:\PROGRA~1\J
MF21~1.1E\lib;C:\WINDOWS\java\classes;.;
C:\Lejos\Project\RoverBot>set CLASSPATH=C:\Lejos\lejos\lib\rcxport.jar;C:\Lejoslejos\lib\classes.jar;.;.;C:\PROGRA~1\JMF21~1.1E\lib\sound.jar;C:\PROGRA~1\JMF21
~1.1E\lib\jmf.jar;C:\PROGRA~1\JMF21~1.1E\lib;C:\WINDOWS\java\classes;.;;
C:\Lejos\Project\RoverBot>set CLASSPATH=C:\Lejos\lejos\lib\BlackBox.jar;C:\Lejos
\lejos\lib\rcxport.jar;C:\Lejos\lejos\lib\classes.jar;.;.;C:\PROGRA~1\JMF21~1.1E
\lib\sound.jar;C:\PROGRA~1\JMF21~1.1E\lib\jmf.jar;C:\PROGRA~1\JMF21~1.1E\lib;C:WINDOWS\java\classes;.;;;
C:\Lejos\Project\RoverBot>set CLASSPATH=C:\Lejos\lejos\lib\rcx.jar;C:\Lejos\lejo
s\lib\BlackBox.jar;C:\Lejos\lejos\lib\rcxport.jar;C:\Lejos\lejos\lib\classes.jar
;.;.;C:\PROGRA~1\JMF21~1.1E\lib\sound.jar;C:\PROGRA~1\JMF21~1.1E\lib\jmf.jar;C:PROGRA~1\JMF21~1.1E\lib;C:\WINDOWS\java\classes;.;;;;
C:\Lejos\Project\RoverBot>set CLASSPATH=C:\Lejos\lejos\lib\comm.jar;C:\Lejos\lej
os\lib\rcx.jar;C:\Lejos\lejos\lib\BlackBox.jar;C:\Lejos\lejos\lib\rcxport.jar;C:
\Lejos\lejos\lib\classes.jar;.;.;C:\PROGRA~1\JMF21~1.1E\lib\sound.jar;C:\PROGRA~
1\JMF21~1.1E\lib\jmf.jar;C:\PROGRA~1\JMF21~1.1E\lib;C:\WINDOWS\java\classes;.;;;
;;
C:\Lejos\Project\RoverBot>set CLASSPATH=C:\Lejos\lejos\lib\jtools.jar;C:\Lejos\l
ejos\lib\comm.jar;C:\Lejos\lejos\lib\rcx.jar;C:\Lejos\lejos\lib\BlackBox.jar;C:Lejos\lejos\lib\rcxport.jar;C:\Lejos\lejos\lib\classes.jar;.;.;C:\PROGRA~1\JMF21
~1.1E\lib\sound.jar;C:\PROGRA~1\JMF21~1.1E\lib\jmf.jar;C:\PROGRA~1\JMF21~1.1E\li
b;C:\WINDOWS\java\classes;.;;;;;;
C:\Lejos\Project\RoverBot>set CLASSPATH=C:\Lejos\lejos\lib\pcrcxcomm.jar;C:\Lejo
s\lejos\lib\jtools.jar;C:\Lejos\lejos\lib\comm.jar;C:\Lejos\lejos\lib\rcx.jar;C:
\Lejos\lejos\lib\BlackBox.jar;C:\Lejos\lejos\lib\rcxport.jar;C:\Lejos\lejos\libclasses.jar;.;.;C:\PROGRA~1\JMF21~1.1E\lib\sound.jar;C:\PROGRA~1\JMF21~1.1E\libjmf.jar;C:\PROGRA~1\JMF21~1.1E\lib;C:\WINDOWS\java\classes;.;;;;;;;
C:\Lejos\Project\RoverBot>set CLASSPATH=C:\Lejos\lejos\lib\rcxrcxcomm.jar;C:\Lej
os\lejos\lib\pcrcxcomm.jar;C:\Lejos\lejos\lib\jtools.jar;C:\Lejos\lejos\lib\comm
.jar;C:\Lejos\lejos\lib\rcx.jar;C:\Lejos\lejos\lib\BlackBox.jar;C:\Lejos\lejos\l
ib\rcxport.jar;C:\Lejos\lejos\lib\classes.jar;.;.;C:\PROGRA~1\JMF21~1.1E\lib\sou
nd.jar;C:\PROGRA~1\JMF21~1.1E\lib\jmf.jar;C:\PROGRA~1\JMF21~1.1E\lib;C:\WINDOWSjava\classes;.;;;;;;;;
C:\Lejos\Project\RoverBot>set CLASSPATH=C:\Lejos\lejos\lib\vision.jar;C:\Lejos\l
ejos\lib\rcxrcxcomm.jar;C:\Lejos\lejos\lib\pcrcxcomm.jar;C:\Lejos\lejos\lib\jtoo
ls.jar;C:\Lejos\lejos\lib\comm.jar;C:\Lejos\lejos\lib\rcx.jar;C:\Lejos\lejos\lib
\BlackBox.jar;C:\Lejos\lejos\lib\rcxport.jar;C:\Lejos\lejos\lib\classes.jar;.;.;
C:\PROGRA~1\JMF21~1.1E\lib\sound.jar;C:\PROGRA~1\JMF21~1.1E\lib\jmf.jar;C:\PROGR
A~1\JMF21~1.1E\lib;C:\WINDOWS\java\classes;.;;;;;;;;;
C:\Lejos\Project\RoverBot>set RCXTTY=USB
C:\Lejos\Project\RoverBot>set PATH=C:\Lejos\lejos\bin;C:\WINDOWS\system32;C:\WIN
DOWS;C:\WINDOWS\System32\Wbem;C:\ClearCase\bin;C:\Program Files\Netegrity\SiteMi
nder Web Agent\bin;C:\Program Files\Netegrity\SiteMinder Web Agent\bin\thirdpart
y;c:\jdk1.3.1_02\bin;c:\jdk1.3.1_02\jre\bin;"C:\Program Files\Hummingbird\Connec
tivity\7.00\Accessories\";C:\Program Files\Microsoft Visual Studio\Common\ToolsWinNT;C:\Program Files\Microsoft Visual Studio\Common\MSDev98\Bin;C:\Program Fil
es\Microsoft Visual Studio\Common\Tools;C:\Program Files\Microsoft Visual Studio
\VC98\bin;C:\java\ant\apache-ant-1.5.3-1\bin;C:\Program Files\SSH Communications
Security\SSH Secure Shell;
...............................................................................
Step II Compile Source files
*****************************************************************************
C:\Lejos\Project\RoverBot>lejosjc.bat RemoteControlTest.java DriveForward.java
HitWallS1.java HitWallS2.java
...............................................................................
StepIII Link compiled files into a bin file
*****************************************************************************
C:\Lejos\Project\RoverBot>lejoslink.bat -o RoverBot.bin RemoteControlTest
...............................................................................
Step IV Download the Compiled files into the RCX
C:\Lejos\Project\RoverBot>lejosdl.bat RoverBot.bin
Read more...

Remote Control
View Comments
Please note that the Remote Control does not come with Mindstorms but comes as part of the ultimate accessory kit.
Read more...




Hello World
View CommentsHere are the steps to creating my HelloWorld.
I have run setenv in the previous set(previous blog)
If your are starting with a fresh command prompt, run it using the previous blog entry as reference.
1. Create a directory HelloWorld under C:\Lejos\Project
2. Create a file HelloWorld.java with the following lines. This program can also be found in
C:\Lejos\Project\HelloWorld>lejosjc.bat HelloWorld.javaimport josx.platform.rcx.*;Go to
/**
* @author calvinedu">Ryan VanderBijl
*/
/* This class uses char[] to display text on the LCD.
* Strings aren't really supported by TinyVM. :-(
*
* This program, after d/ling, waits for you to press the RUN
* button, and then displays "hello", for a small delay, and then
* displays "world". (Then a small delay, and then it returns to
* the TinyVM OS).
*/
public class HelloWorld
{
public static void main (String[] aArg)
throws Exception
{
LCD.clear();
TextLCD.print ("hello");
Thread.sleep(2000);
TextLCD.print ("world");
Thread.sleep(2000);
}
}this link and follow the directions on how to build download and run it.
Here is my output
...........................................................................................
c:\>cd C:\Lejos\Project
C:\Lejos\Project>mkdir HelloWorld
C:\Lejos\Project\HelloWorld>lejoslink.bat -o HelloWorld.bin HelloWorld
Warning: Can't open zip/jar file: C:\Lejos\lejos\lib\comm.jar
Warning: Can't open zip/jar file: C:\Lejos\lejos\lib\rcx.jar
Warning: Can't open zip/jar file: C:\Lejos\lejos\lib\BlackBox.jar
Warning: Can't open zip/jar file: C:\Lejos\lejos\lib\rcxport.jar
Warning: Can't open zip/jar file: C:\Lejos\lejos\lib\comm.jar
Warning: Can't open zip/jar file: C:\Lejos\lejos\lib\rcx.jar
Warning: Can't open zip/jar file: C:\Lejos\lejos\lib\BlackBox.jar
Warning: Can't open zip/jar file: C:\Lejos\lejos\lib\rcxport.jar
Warning: Can't open zip/jar file: C:\Lejos\lejos\lib\rcxport.jar
Warning: Can't open zip/jar file: C:\Lejos\lejos\lib\BlackBox.jar
Warning: Can't open zip/jar file: C:\Lejos\lejos\lib\rcx.jar
Warning: Can't open zip/jar file: C:\Lejos\lejos\lib\comm.jar
Warning: Can't open zip/jar file: C:\Lejos\lejos\lib\rcxport.jar
Warning: Can't open zip/jar file: C:\Lejos\lejos\lib\BlackBox.jar
Warning: Can't open zip/jar file: C:\Lejos\lejos\lib\rcx.jar
Warning: Can't open zip/jar file: C:\Lejos\lejos\lib\comm.jar
Warning: Can't open zip/jar file: C:\Lejos/lib/classes.jar
Warning: Can't open zip/jar file: C:\Lejos\lejos\lib\rcxport.jar
Warning: Can't open zip/jar file: C:\Lejos\lejos\lib\BlackBox.jar
Warning: Can't open zip/jar file: C:\Lejos\lejos\lib\rcx.jar
Warning: Can't open zip/jar file: C:\Lejos\lejos\lib\comm.jar
Warning: Can't open zip/jar file: C:\Lejos\lejos\lib\rcxport.jar
Warning: Can't open zip/jar file: C:\Lejos\lejos\lib\BlackBox.jar
Warning: Can't open zip/jar file: C:\Lejos\lejos\lib\rcx.jar
Warning: Can't open zip/jar file: C:\Lejos\lejos\lib\comm.jar
Warning: Can't open zip/jar file: C:\Lejos\lejos\lib\rcxport.jar
Warning: Can't open zip/jar file: C:\Lejos\lejos\lib\BlackBox.jar
Warning: Can't open zip/jar file: C:\Lejos\lejos\lib\rcx.jar
Warning: Can't open zip/jar file: C:\Lejos\lejos\lib\comm.jar
C:\Lejos\Project\HelloWorld>
C:\Lejos\Project\HelloWorld>dir
Volume in drive C has no label.
Volume Serial Number is F0CC-206D
Directory of C:\Lejos\Project\HelloWorld
C:\Lejos\Project\HelloWorld>
C:\Lejos\Project\HelloWorld>dir
Volume in drive C has no label.
Volume Serial Number is F0CC-206D
Directory of C:\Lejos\Project\HelloWorld
04/04/2005 11:03 PM .
04/04/2005 11:03 PM ..
04/04/2005 11:03 PM 2,789 HelloWorld.bin
04/04/2005 11:02 PM 554 HelloWorld.class
04/04/2005 11:02 PM 658 HelloWorld.java
3 File(s) 4,001 bytes
C:\Lejos\Project\HelloWorld>lejosdl.bat HelloWorld.bin
C:\Lejos\Project\HelloWorld>
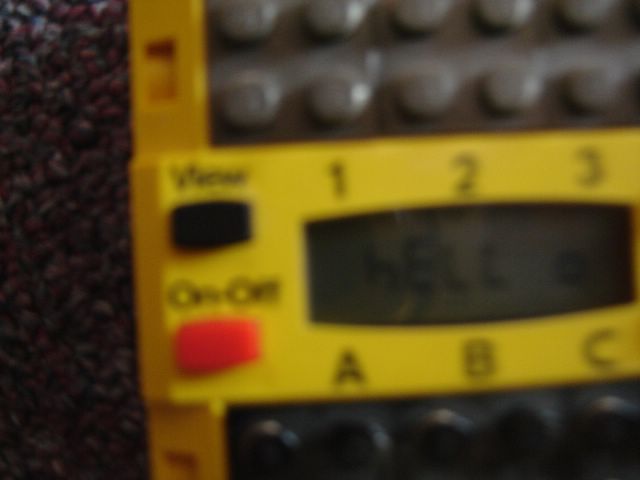
NOW press the red button to display 'Hello' on the LCD of the RCX. The 'World' will come a couple of seconds later,
Read more...
USB Infrared Transmitter Tower
View Comments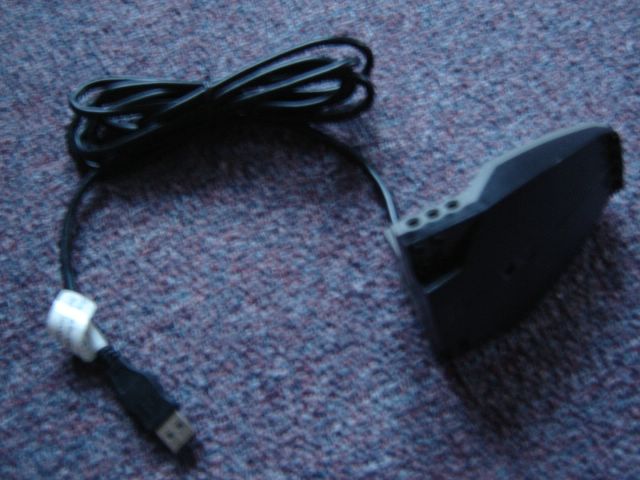
This item also comes with the RIS 2.0 Box. It is used to transfer programs or send commands to the RCX.
Read more...
Lego Mindstorms
View Comments
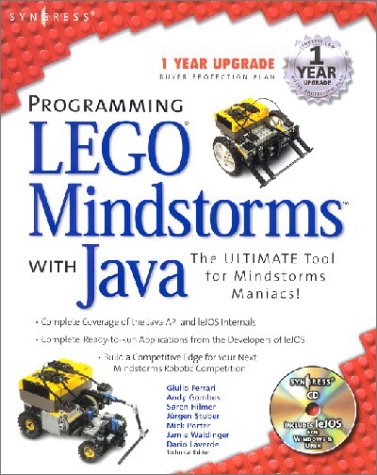
Here is the magic box. And By the way,
- Dont bother installing any of the software from the box. We will not be using it.
- Why? See the 1st chapter of the book I am using in a future blog entry. As mentioned before we will be using LEJOS to program our robots
Read more...
Subscribe to:
Posts (Atom)